IoT Smart Home with ESP8266, SmartThings, and Google Home - Summer Project
smart homeGoal
My family bought our house around 4 years ago, and it came with a very interesting home media setup. There are 3 TVs in different rooms of the house, and one projector in the home theater. The home theater and the master bedroom also have 7.1 channel surround sound. Furthermore, the theater has a Panamorph lens which stretches the image to fit the cinemascope projector screen. The inputs and IR blasters for each of the displays connects to a centralized rack in a closet. The whole thing was setup to be controlled by Universal Remote Control remotes. The system is advanced for when it was installed (probably around 2008), but today it feels crude and overly complex. There were a few owners of the house after the system’s installation, so some devices are missing or misconfigured. I’ve tried reprogramming the remotes in the past, but they require custom software that Universal Remote Control doesn’t provide for all of the remotes. As a result, the system has remained difficult to control and has largely gone unused by my family unless I am at home to start it for them. Despite being installed a decade ago, the displays are still HD and the theater is very nice, so I wanted to modernize the system so that my family could easily use it.
The Problem
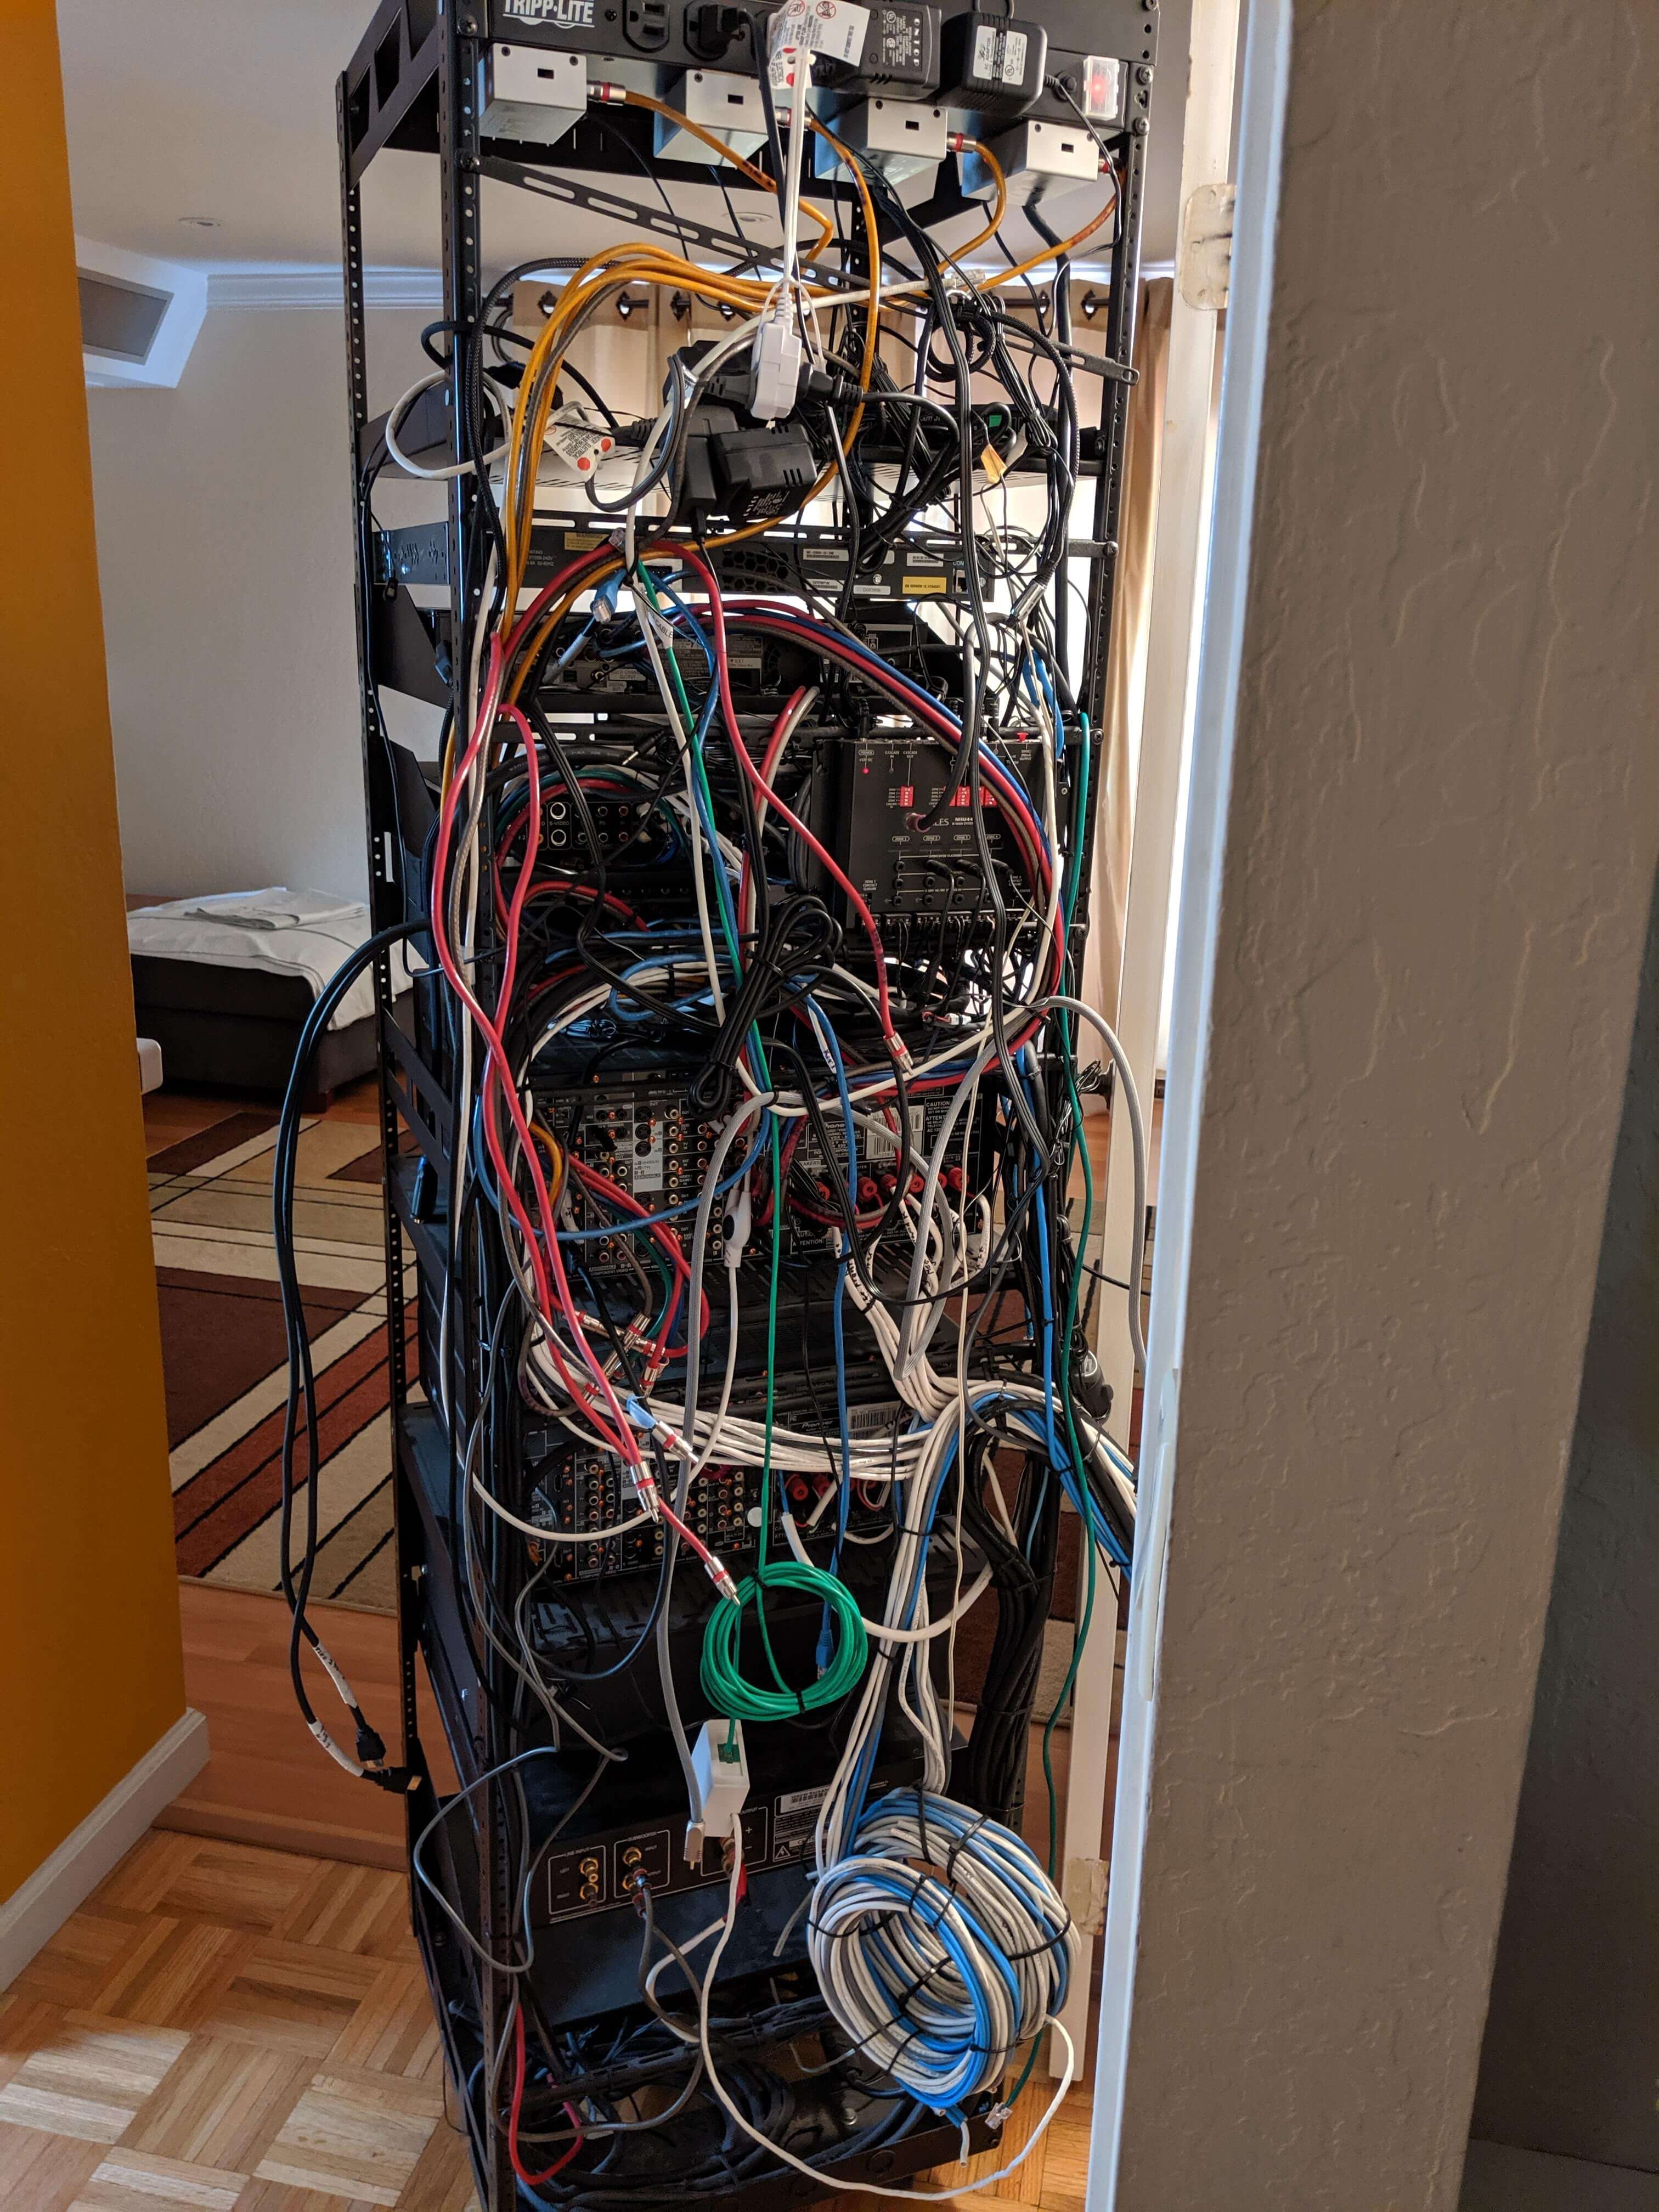
Here is an image of the rack before I began:

It was quite a mess with loose cables and weird connections as a result of the removed devices. To make the system easier to work with, I needed to remove the unused cables and rewire the system. The rack itself consists of the following devices (from top to bottom):
- Cisco 100Mbps switch (fans too loud to use)
- Sony Blu-Ray Player
- Optoma projector control box
- Backyard speakers zone amplifier
- 4x4 A/V Matrix (analog)
- 4x4 HDMI Matrix
- Theater receiver
- Master bedroom receiver
- Theater subwoofer amplifier
Attached to the back of the rack are the IR zone amplifier and connecting block. The system interacts with the universal remotes by accepting RF transmissions from the remotes, sending the proprietary signal from the RF receiver to the Universal Remote IR controller, and then sending the IR signals through wires connected via 3.5mm TS connectors to the rest of the system. The IR blasters on the TVs and other devices in the rack are connected to the IR zone amp and connecting block with TS connectors.
This whole system needed to be modified and automated so that simple commands from an intuitive interface can control any device in any room.
Approach
My initial thought was to automate Universal Remote keypresses to control the system, but that was even more crude than the existing system. Instead, I decided to choose an intercept point for the Universal Remote signal. I could either read the signal from the RF receiver to the URC controller and then decode it somehow to repeat it later, or I could connect the IR blocks directly to a smart device and send IR codes through it. I chose the latter option because decoding the proprietary format seemed like too much work and too far out of my area of experience.
After doing some research, I found that the ESP8266 was a cheap and low power way to blast IR signals to the emitters, especially since there is already an open source blueprint for an HTTP IR Blaster. I had to modify the code slightly in order to support more than 4 blasters. There were 5 blasters connected to the URC IR Controller, so I assumed that I would need to connect all of them to the ESP8266 as well. This would later turn out to be unnecessary because there were only 3 zones I needed independent connections for.
Unfortunately, after I setup the ESP8266 and connected the blasters, not all of the devices and blasters would work properly. Some testing led me to believe that the voltage was too low for some of the blasters, and passing the signal through the IR zone amplifier fixed the problem. I connected three TS cables to the ESP8266 via the Wifi IR blaster from http://irblaster.info/. The zone amp sent the signals for the kitchen and master bedroom zones to the respective devices, but the main zone needed to be sent to the connecting block first in order to send it to all of the 6 to 8 devices that could be controlled. The kitchen and master bedroom needed to be split because they both had Sony TVs, which would both respond to the same IR codes. The master bedroom receiver and theater receiver conflicted as well. After resolving this issue, I had to manually learn every IR code from the Universal Remote by opening the ESP8266 HTTP IR web interface, blasting the code, and copying the query used to emit that code into a spreadsheet.

At this point, I knew that I wanted a nicer interface with the system, and my parents already had a Google Home mini that they were familiar with, so I got 2 more to put in the other rooms and made that the primary interface. However, this came with its own problems. For some reason, Google does not provide any way to add commands directly to the Google Home. Instead, you need to use IFTTT to create applets that take commands and execute actions. The downside of this is that IFTTT queries from outside of the network, so the ESP8266 needs to be publicy accessible or a reverse proxy needs to be run. We already had a SmartThings hub to control the Z-Wave light switches that came installed in the house, so I used that to handle the requests.
Creating SmartThings smartapps for each IFTTT request is far too time consuming due to the clunky web interface, so I installed the WebCoRE smartapp, which acts as a meta-layer to make the whole process easier. This involves creating “pistons” for each request from IFTTT, which can then execute local HTTP requests through the SmartThings hub. The most important part is that WebCoRE pistons are executable externally using the SmartThings API. I also added state tracking and some arguments that can be passed through the URL in order to control things like volume. This part of the project likely took the longest because WebCoRE doesn’t allow users to write code for some reason. The code is encoded into JSON and executed by a custom runtime in the SmartApp, so it is understandable that most users may not want to write code directly, but having to click to add elements is frustrating. Furthermore, all if statements in WebCoRE subscribe to any variables in the conditional, which means that if you don’t manually disable all of the ones you don’t want, there is an endless pinging back and forth between pistons. Overall, WebCoRE may have been simpler than writing smartapps directly, but I would’ve preferred some more advanced features.
A voice interface is not always ideal, such as when controlling playback or navigating menus. To resolve this, I wrote a quick React app with Grommet to act as a remote. In the process, I learned a little bit about CORS and the same origin policy, which I hadn’t dealt with before. Because I was issuing requests to the ESP8266, the HTPC API, and the SmartThings API, I was getting CORS errors. It turns out that CORS only applies to the response from the API, and because no necessary information is in the response from any of these APIs, I simply added no-cors to the requests and removed the errors.

After rewiring the rack and installing a new HDMI Matrix that supported HDCP properly, everything works great. Most importantly, since I wrote some documentation explaining how to use the system, my family is able to use it when I’m not at home.
Conclusion
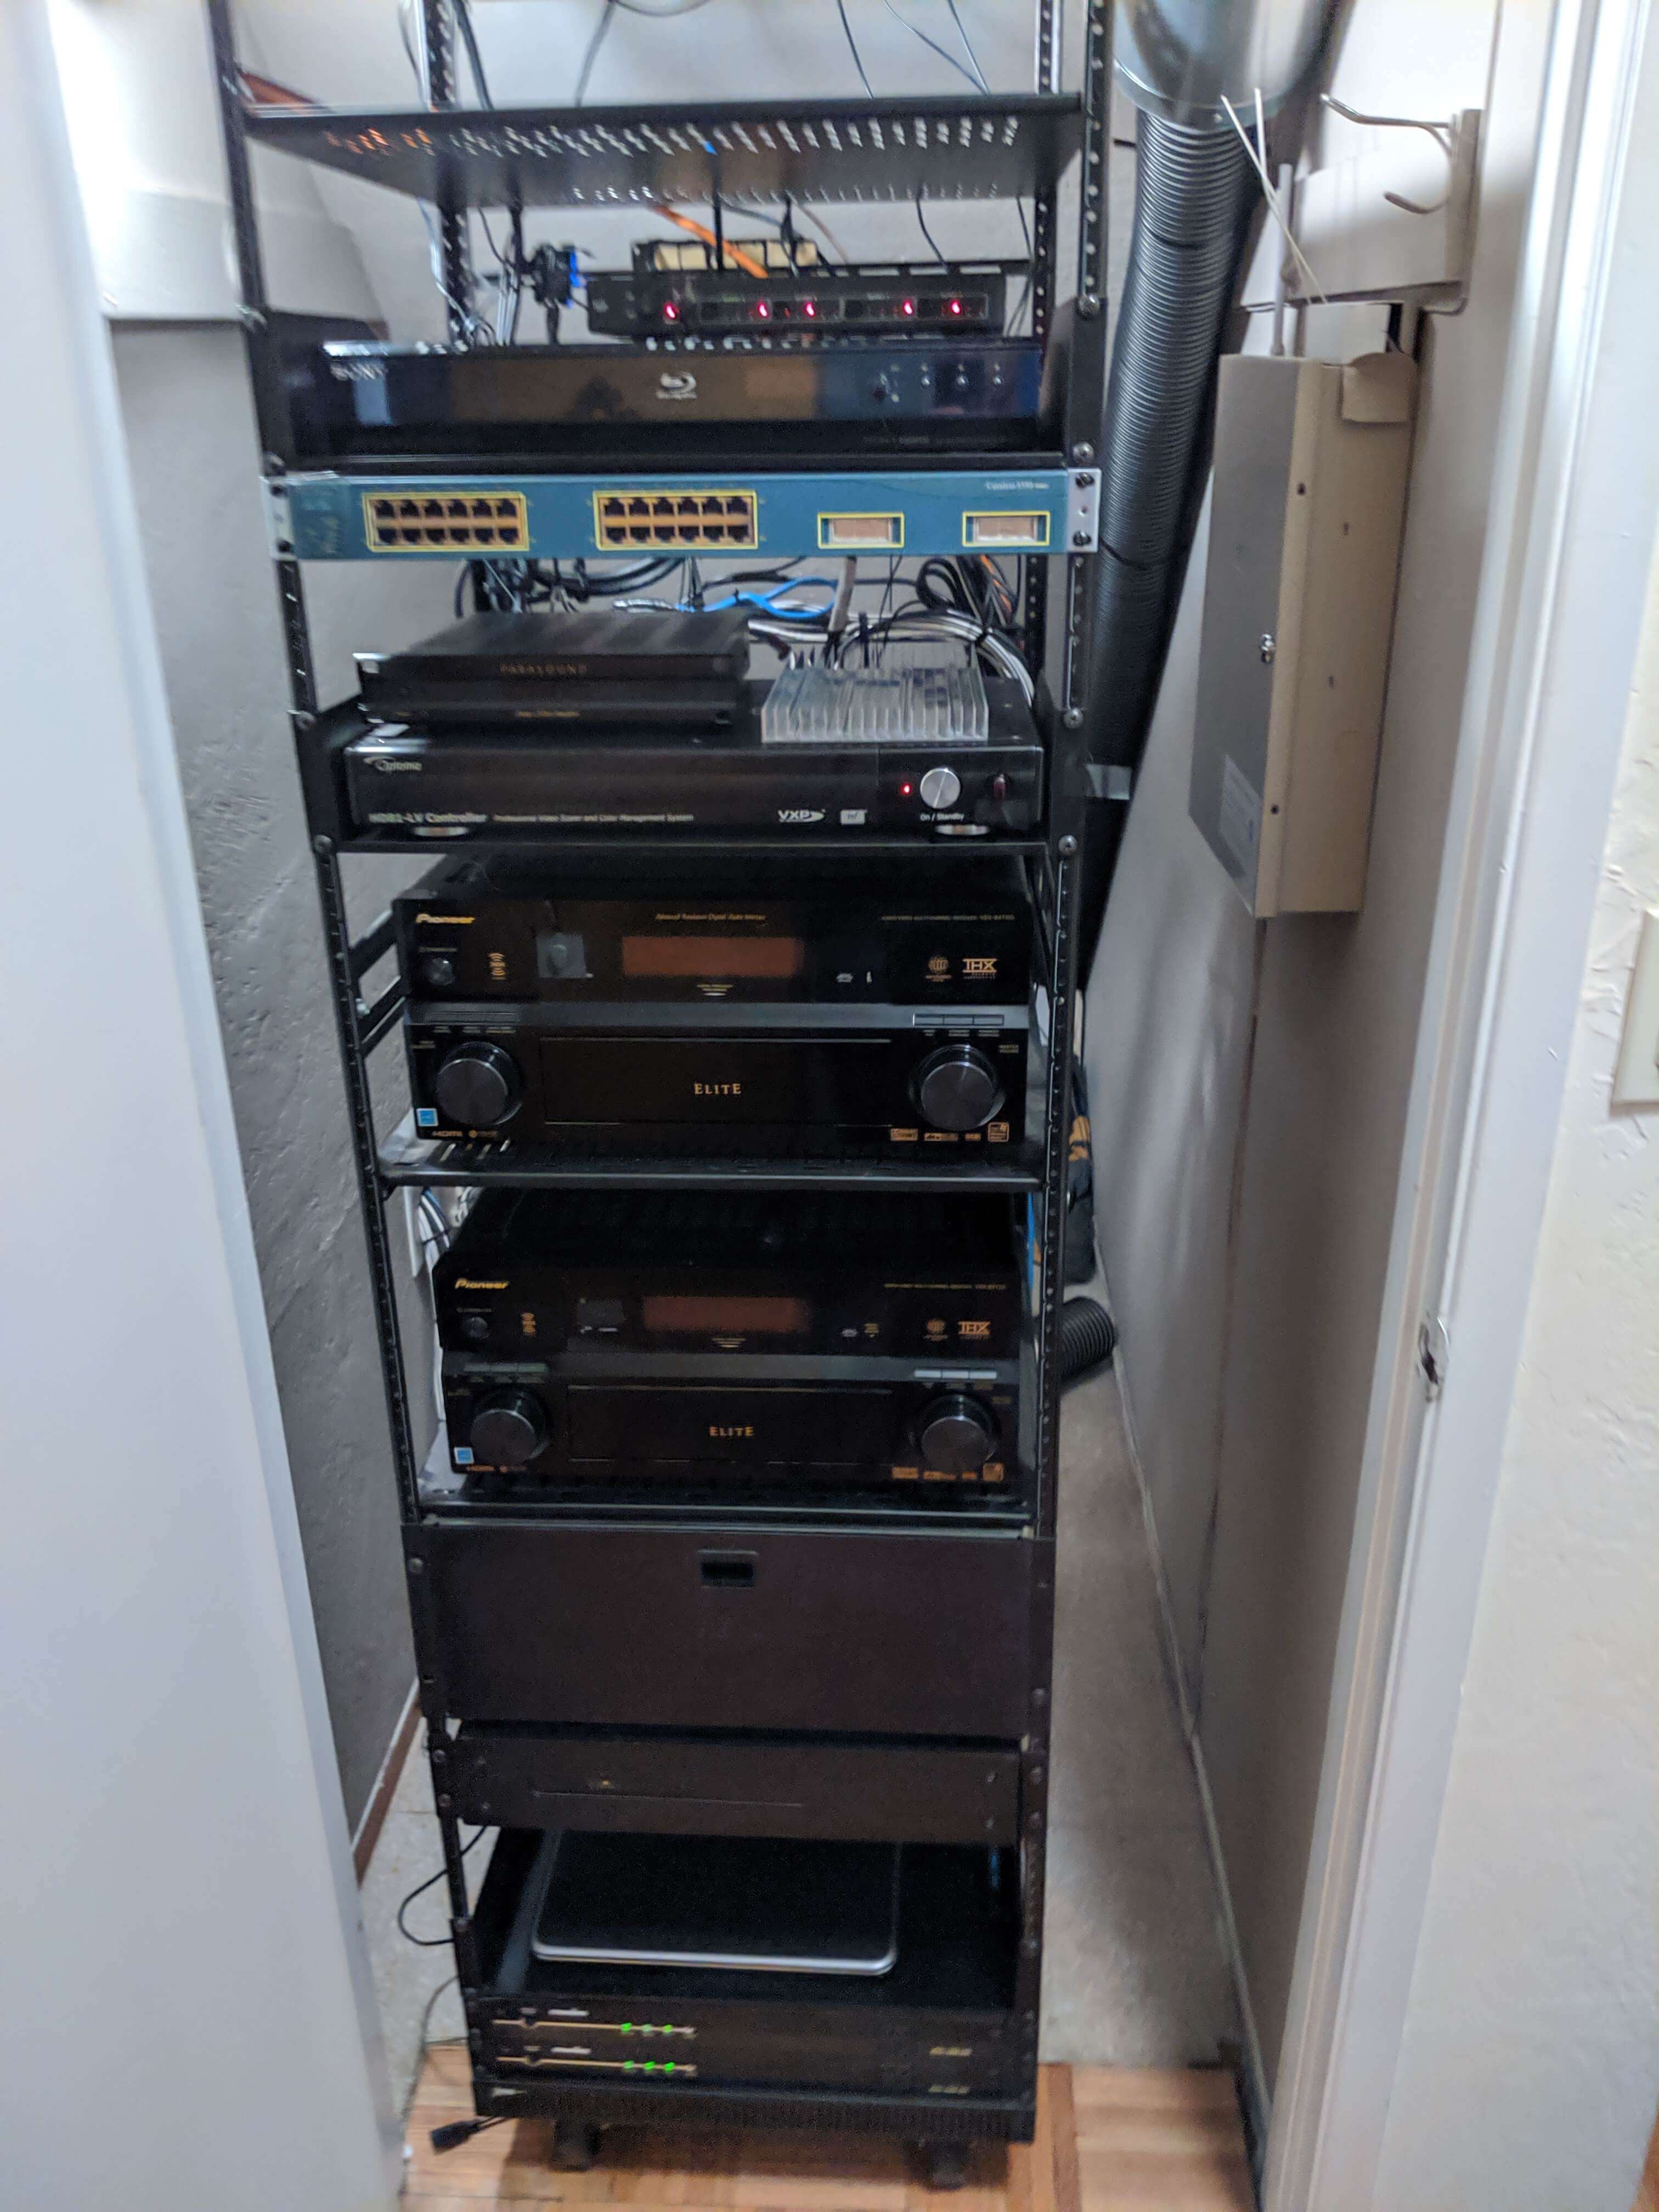
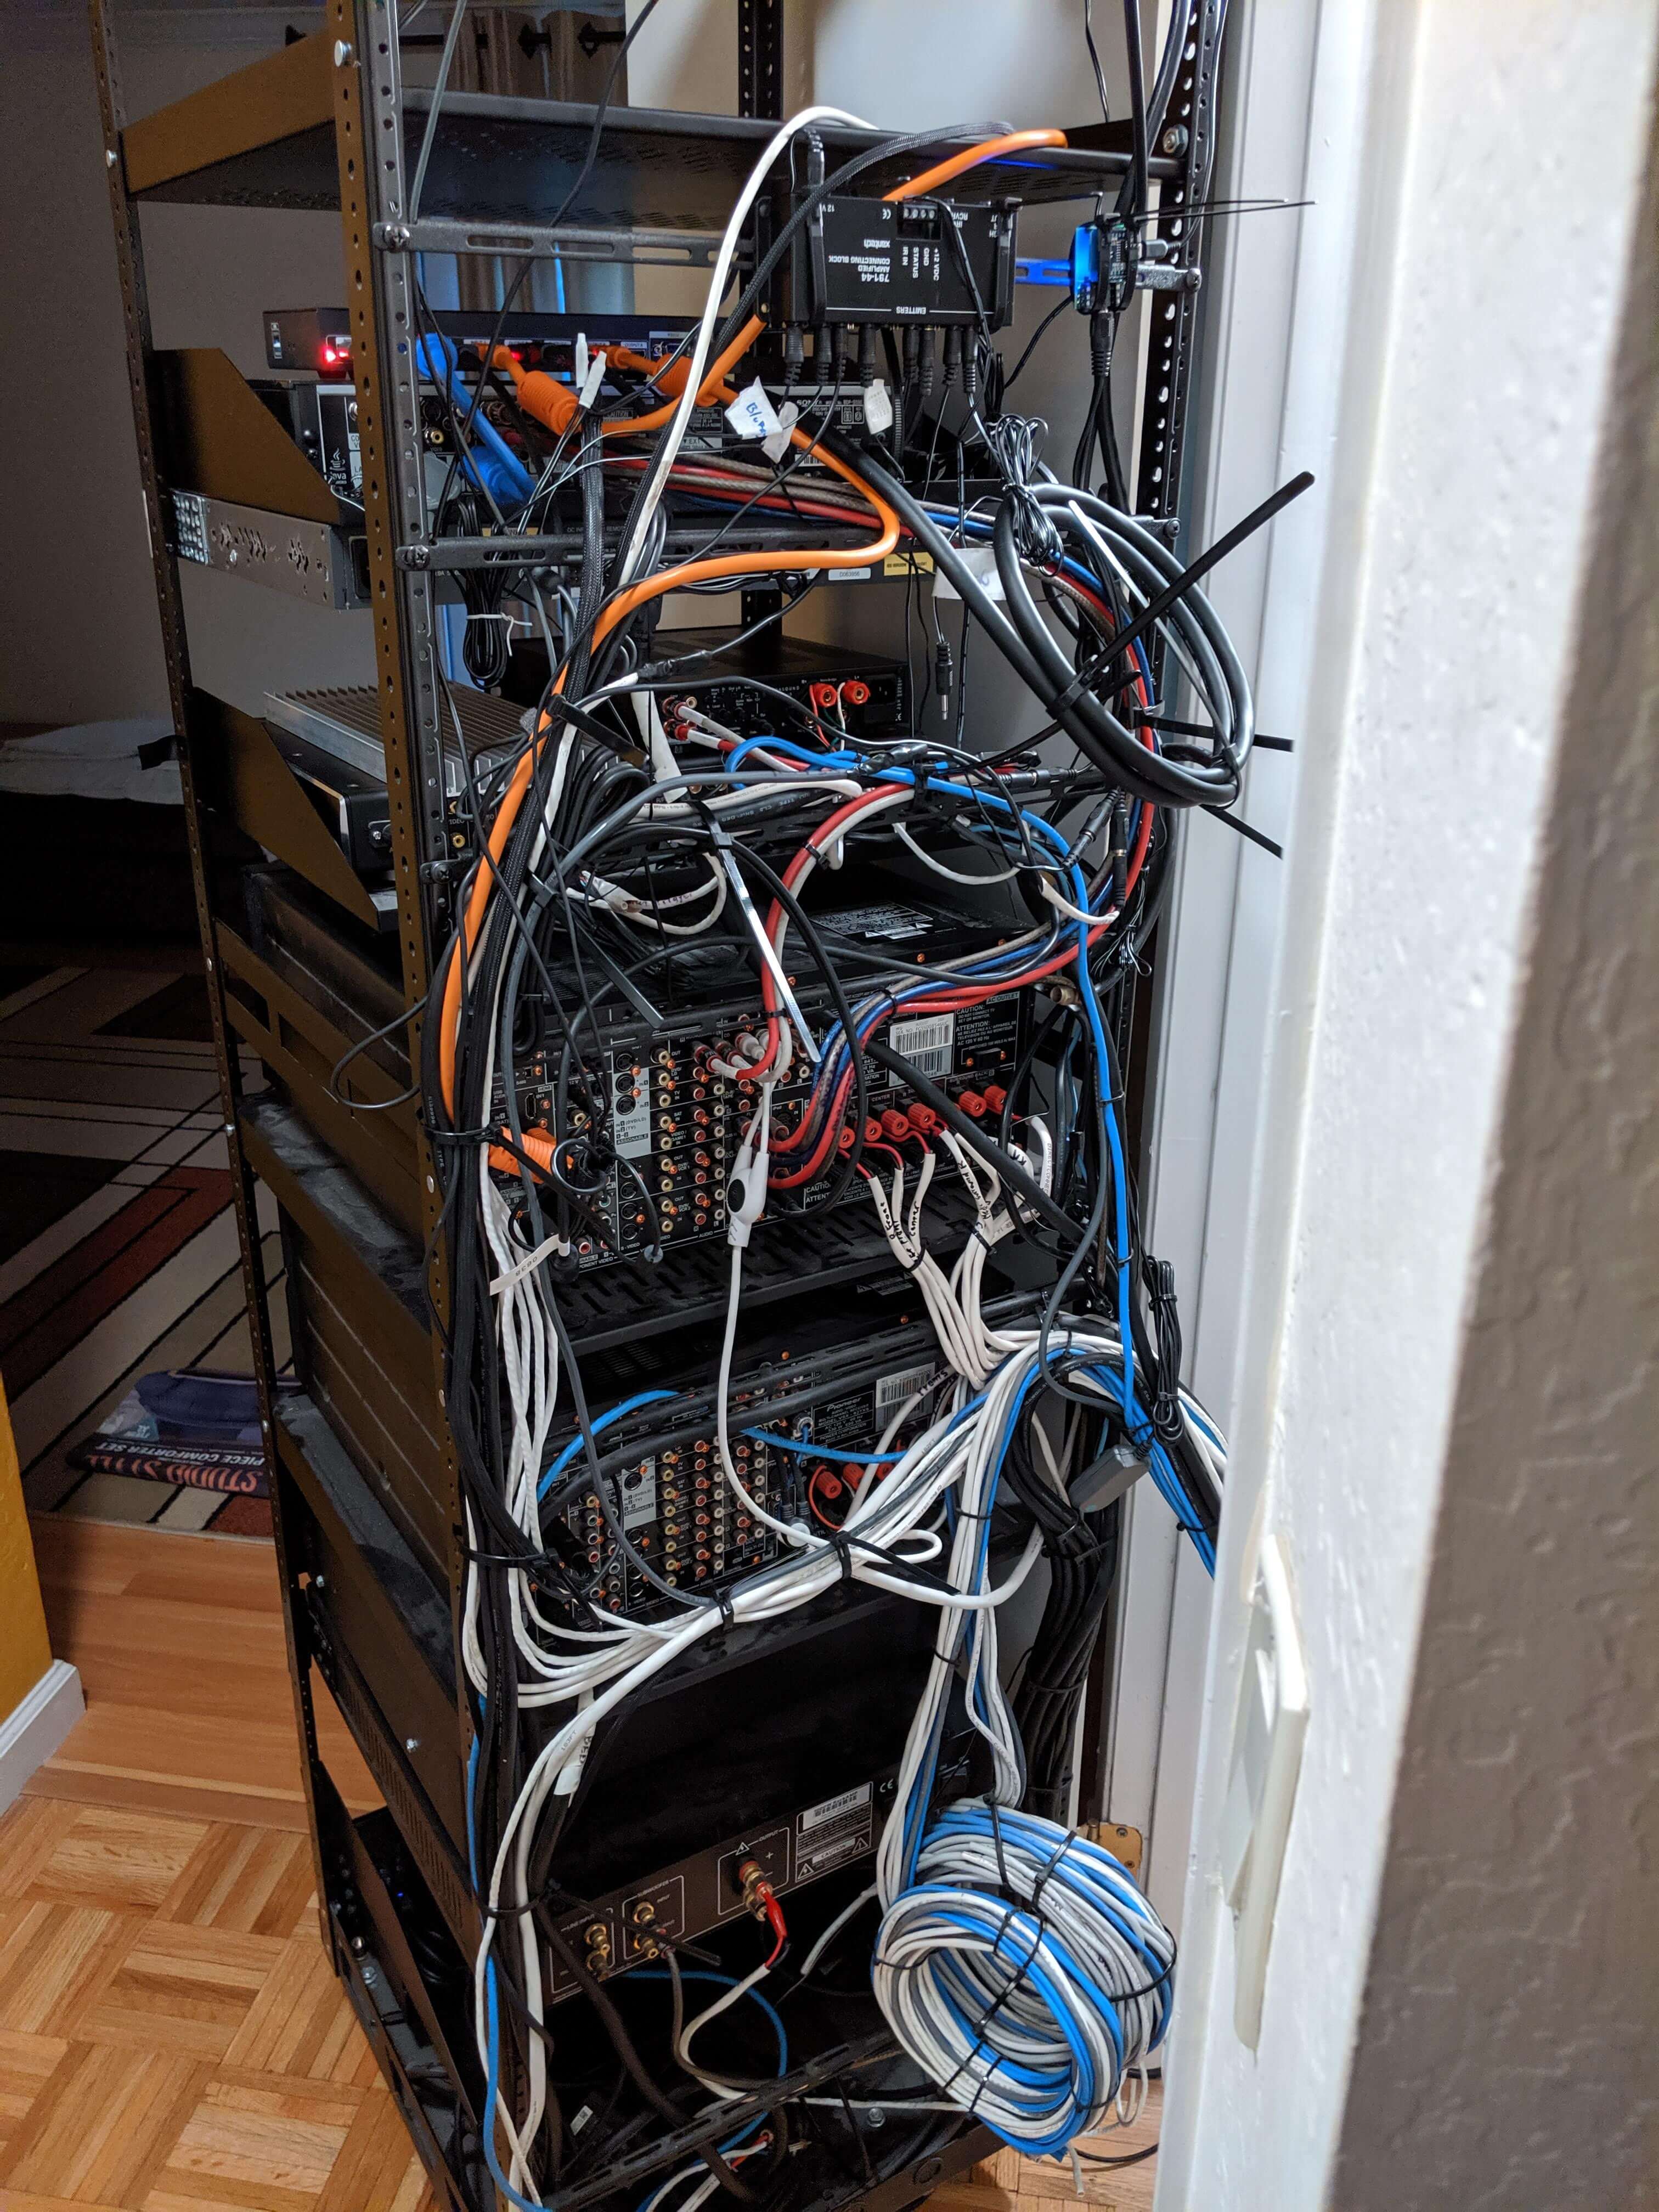
Here are some pictures of the rack after the project was completed.


This whole process was overly complex and has many potential security flaws. I’m not too concerned with security in this specific application because nothing meaningful is connected to the system. Even if the entire thing is compromised, the worst an attacker can do is control the media center and turn TVs on and off. Google needs to invest in their Google Home lineup if they really want it to compete against Alexa, which has a skills system that would be much more useful for a system like this. Google has a system for businesses to add commands, but those are behind an additional trigger, which makes them more cumbersome to use.
This project turned out to be more of an engineering project than a programming project. I had to come up with my own solution and fully utilizing the knowledge that I have gained over the years, and I even needed to create documentation. This was probably my first real experience with professional level development, although obviously the quality was lower than I would do in a professional setting since it was for personal use. The project was not as much about learning more as it was about learning to apply what I have learned, and in that regard it was successful. I’ve gained a better handle on integrating various aspects of technology and creating a product usable by a non technical user.
Follow Up
In the future, I may consider expanding on the remote app. I’m unsure what the demand would be for a smart home remote that integrates with multiple services, especially since there may already be some out there. However, when I was creating mine, it was very difficult for me to find any, especially any that are programmable and customizable. This may be an area that I can explore in the future. Grommet already has a UI builder that I can modify to be a remote builder instead. However, I would need to be very careful with security if I chose to expand on this because handling other peoples’ security is more important than handling my own. I may also be able to sell something like this to smart home integrators since there doesn’t seem to be a major remote app currently.
This entire process can be improved dramatically, which I may also consider trying out in the future. If Google’s custom command API improves, I can try creating a general purpose system that is easier to set up than what I did, so that other people can avoid spending hours creating pistons and IFTTT applets. Overall, there is a lot of potential in the IoT and smart home space, and I may be interested in exploring it further in the future.